![]()
![]()
|
|
|
Daily View
Summary |
Filters allow you to display a specific group of employee records in Daily View. You can filter records by single fields or by a combination of fields in Employee View or Drill Down. Important: You cannot use the Save Layout As option to save filters in Daily View. |
Apply a filter |
When you click the Filters button
This example filters Employee View by location.
|
Active Filter Bar |
When you apply a filter, the Active Filter Bar at the bottom of the grid or area contains the following buttons: Cross Tick checkbox Drop-down Customize |
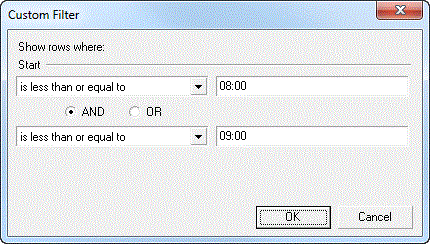
Custom Filter |
When you click "(Custom...)" in the Filter drop-down menu, the Custom Filter form appears. This example creates a filter to view only employees who clocked in between 08:00 and 09:00 (inclusive).
Employee View now displays only employees who have a start time between 08:00 and 09:00 (inclusive). When you create a Custom Filter for a non-numeric field, the drop-down options include "like" and "not like". You can use the following wildcard characters with these options:
|
Apply multiple filters |
You can use multiple filters to select a very specific group of employees. Based on the previous examples, you could apply the location filter and the start time custom filter to display only employees who worked in the specified location and started between 08:00 and 09:00 (inclusive). |
Save Custom Filter |
You can save custom filters. This example shows how to save the custom filter created in the previous example.
|
Open saved Custom Filter |
You can open saved custom filter. This example show how to open the DVStart8-9.flt saved in the previous example.
You can also edit and save your filter. |
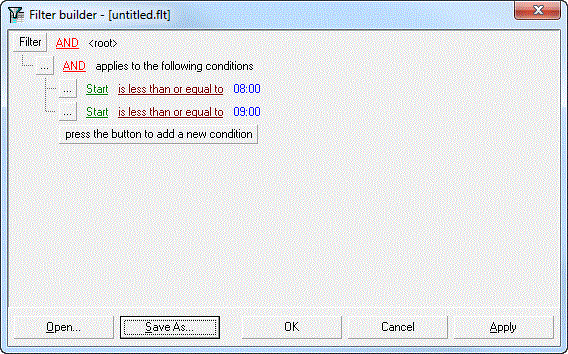
Filter builder |
The Filter builder form contains the following features: Filter
AND, OR, NOT AND, NOT OR ...
(Field) (Operator) (Value) press the button to add a new condition Open Save As Note: You cannot save filters in hosted environments, such as PayGlobal Online Services. OK Cancel Apply |
|
|
|